Advanced Slides with Slidev
I recently spoke at ReactNext and NodeTLV conferences, and Slidev was instrumental in making those presentations engaging and interactive. The ability to embed live code editors, create smooth animations, and maintain slides as code gave me capabilities that traditional presentation tools simply can’t match. In this guide, I’ll share the advanced techniques and features that made those presentations possible.
Why Slidev?
Slidev combines the simplicity of Markdown with the power of Vue.js, making it ideal for technical presentations. Unlike traditional presentation tools, Slidev treats your slides as code, giving you version control, reusable components, and the ability to embed actual running code in your presentations.
Getting Started
Create your first presentation in seconds:
pnpm create slidevThis generates a basic template with slides.md. For a more advanced starting point, explore antfu’s talks repository which showcases professional presentation patterns.
Basic Setup & Workflow
IDE Support
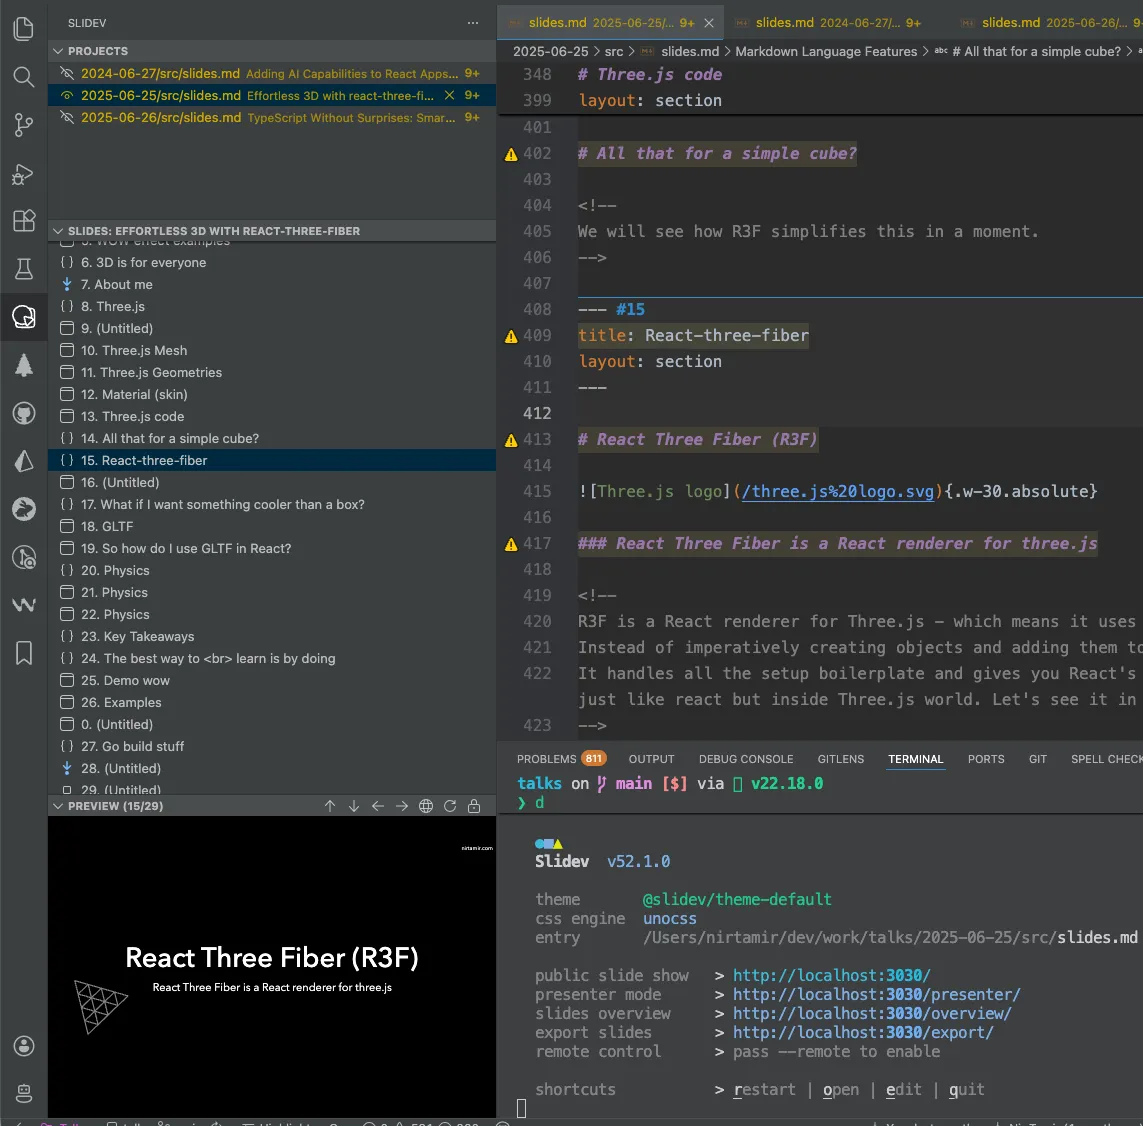
The Slidev VSCode extension is essential for an optimal workflow. It provides live previews, syntax highlighting, and autocompletion directly in your editor.
Since slides are Markdown files, you can leverage familiar tools:
- Prettier with the slidev plugin keeps your slides consistently formatted
- ESLint validates code snippets before you present
- Obsidian works as an alternative editor (I created the obsidian-slidev plugin for this)
Prettier configuration (optional but recommended):
export default {
  plugins: ["prettier-plugin-slidev"],
  overrides: [
    {
      files: ["slides.md", "pages/*.md"],
      options: {
        parser: "slidev",
        plugins: ["prettier-plugin-slidev"],
      },
    },
    {
      files: "*.svg",
      options: {
        parser: "html",
      },
    },
  ],
};
Slide Fundamentals
Slides use standard Markdown syntax with --- as separators. Control each slide’s appearance with frontmatter:
---
layout: center
class: text-center pb-5
---

# Your Slide Title

Content goes here
Pro tip: Use HTML for precise positioning when needed, but stick to Markdown for readability and maintenance.
Content Creation
Layouts for Every Purpose
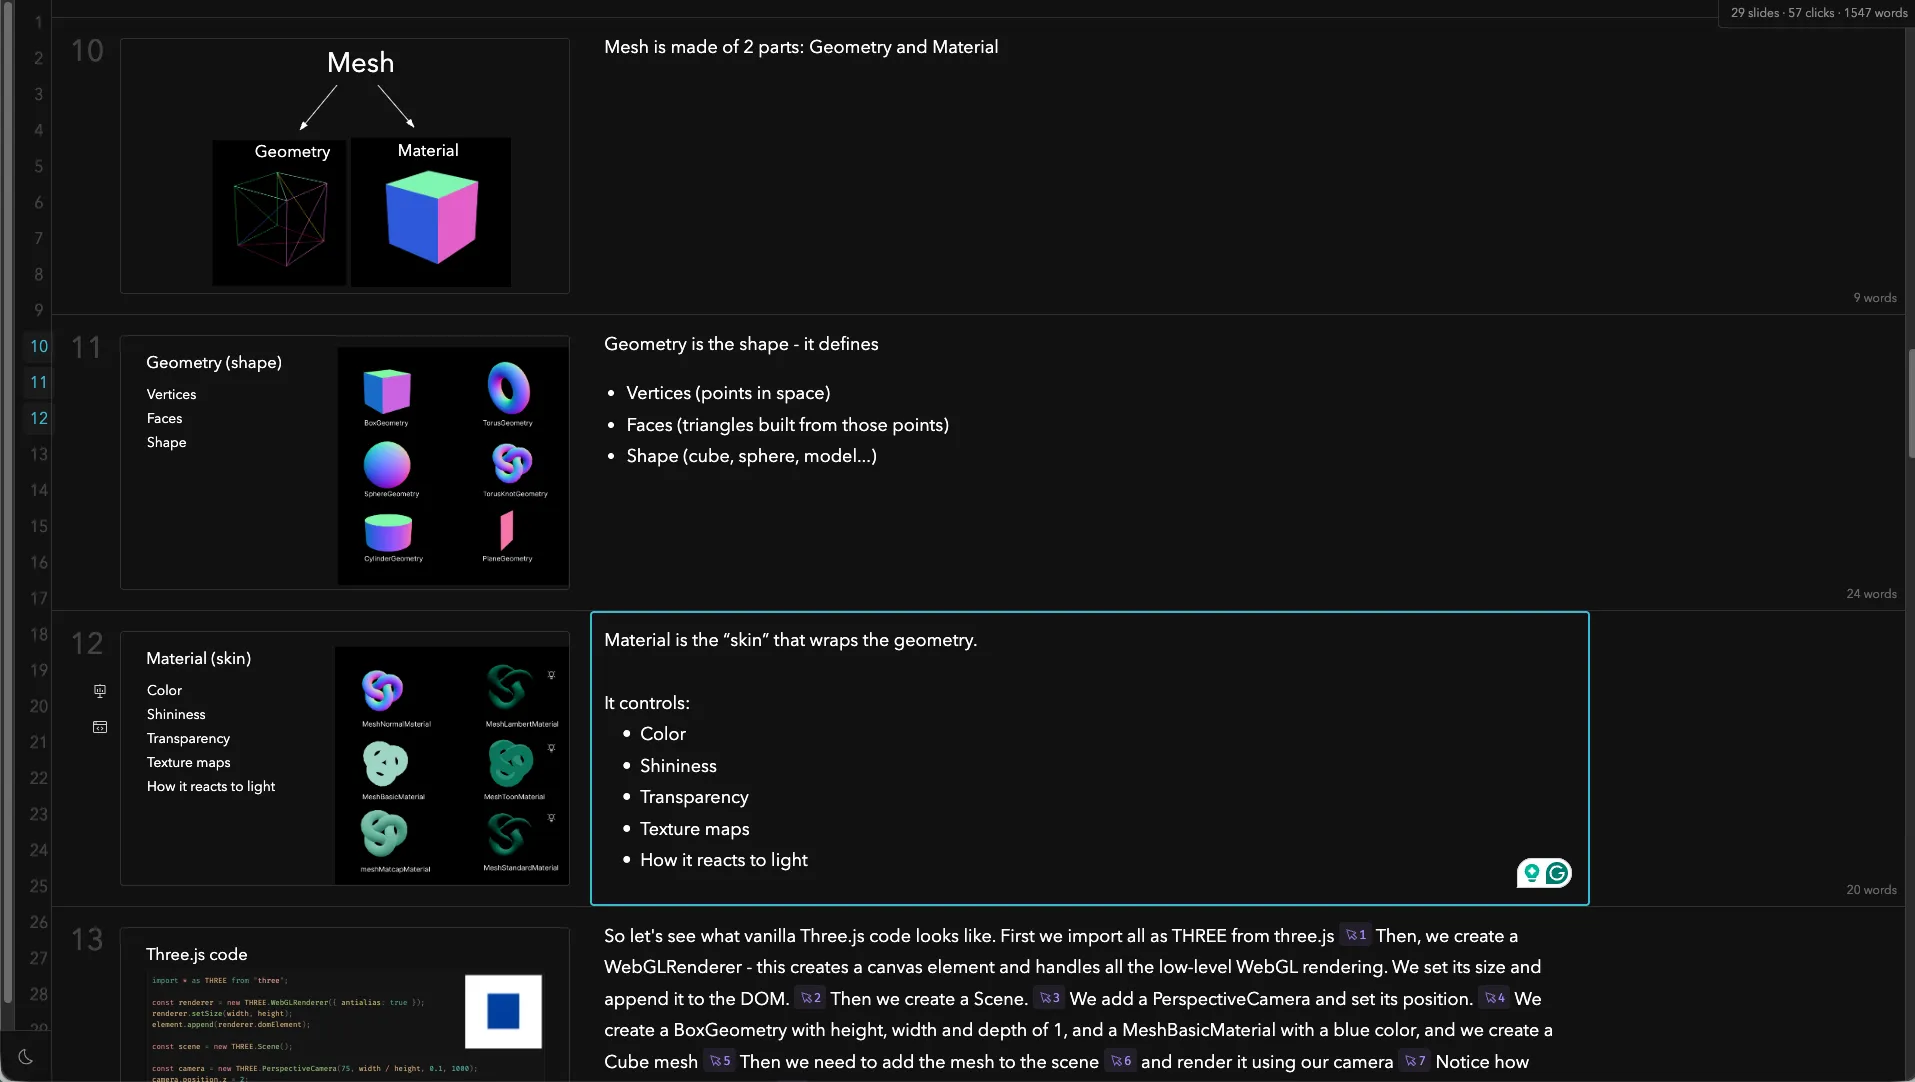
Slidev includes professional built-in layouts that handle common presentation patterns:
cover- Eye-catching title slidescenter- Centered content for impactimage-right- Visual explanations with imagesintro- Speaker introductionssection- Clear section breakstwo-columns-header- Side-by-side comparisons
View the source code to understand how they work.
Custom Layouts
Need something specific? Create Vue components in your layouts/ folder. For example, here’s a modified two-column layout with adjustable gap:
---
layout: two-cols-header-gap
---

# Side-by-side code and result

::left::

```tsx
export default function App() {
  return (
    <Canvas>
      <ambientLight />
      <mesh>
        <boxGeometry />
        <meshStandardMaterial />
      </mesh>
    </Canvas>
  );
}
```

::right::

<BrowserWrapper>
  <DemoIframe url="/demo/basic" />
</BrowserWrapper>
```
Start by copying existing layouts from Slidev’s GitHub and modify to fit your needs.
Styling with UnoCSS
Slidev uses UnoCSS, which means you can apply Tailwind-style utility classes directly to any element. This gives you pixel-perfect control without leaving your Markdown:
<div class="text-2xl font-bold text-blue-500">
  Styled text
</div>
Code Presentation
Code is often the star of technical presentations. Slidev makes it shine.
Syntax Highlighting
Wrap code in triple backticks with the language name for automatic highlighting:
```ts
function divide(a: number, b: number) {
  return a / b;
}
```
Progressive Line Highlighting
Guide your audience’s attention by highlighting specific lines. Add metadata after the language name:
```ts {all|1|2,4|3|2-4|all}
function divide(a: number, b: number) {
  return a / b;
}
```
Quick Reference:
{all}- Highlight everything{1}- First line only{2-4}- Lines 2 through 4{1,3,5}- Specific lines{all|1|2-3}- Click through these steps
Each section separated by | represents a new click step during your presentation.
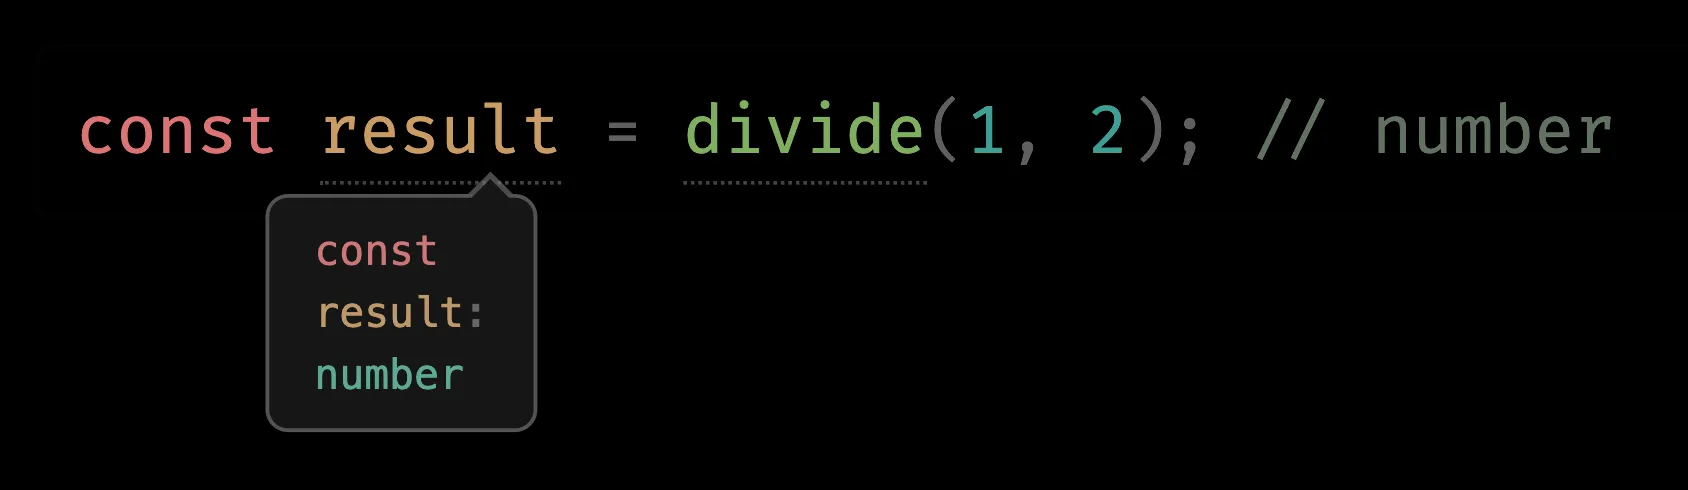
TypeScript Type Hints with Twoslash
Show your audience exactly what types TypeScript infers. Use ts twoslash to display inline type information and catch errors:
```ts twoslash
function divide(a: number, b: number) {
  return a / b;
}
// ---cut-before---
const result = divide("hi", 2);
```
The ^? annotation shows type information, while // ---cut-before--- hides setup code from the audience but keeps it for type checking.

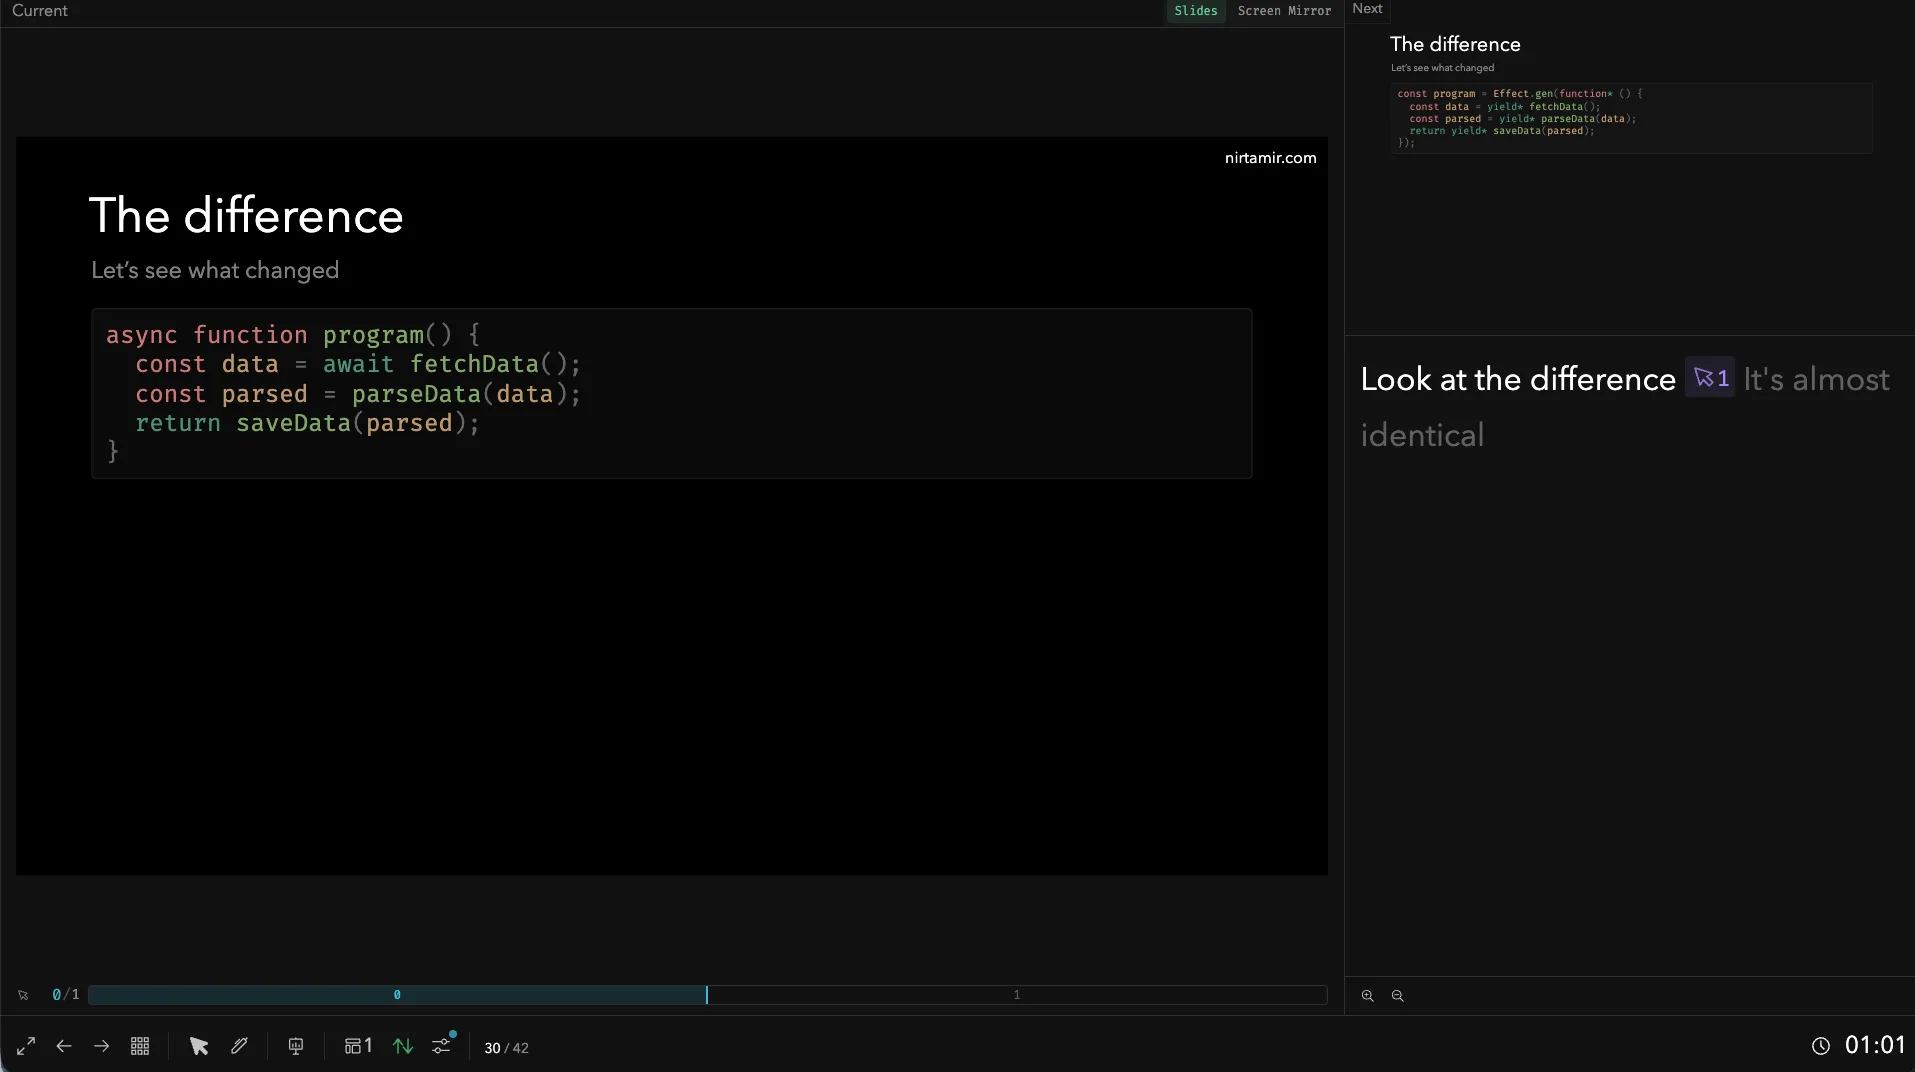
Magic Move for Code Transformations
When demonstrating refactoring or showing how code evolves, Magic Move creates smooth transitions between code states. Use four backticks with md magic-move:
````md magic-move
```ts
async function program() {
  const data = await fetchData();
  const parsed = parseData(data);
  return saveData(parsed);
}
```

```ts
const program = Effect.gen(function* () {
  const data = yield* fetchData();
  const parsed = yield* parseData(data);
  return yield* saveData(parsed);
});
```
````
This shines when showing code refactoring, demonstrating how one pattern evolves into another, or explaining step-by-step improvements.

Live Code with Monaco Editor
Let your audience experiment with code during your presentation. Slidev embeds the Monaco editor (VSCode’s editor) with live execution using monaco-run:
---
monacoRunAdditionalDeps:
  - ollama
---

```js {monaco-run}
import ollama from "ollama/browser";

const response = await ollama.chat({
  model: "llama3",
  messages: [{ role: "user", content: "Why is the sky blue?" }],
  stream: true,
});
for await (const part of response) {
  console.log(part.message.content);
}
```
Note: This requires network access and appropriate dependencies. Test thoroughly before presenting offline.
Interactivity
Progressive Disclosure with v-click
Build suspense and control pacing by revealing elements one at a time:
<div v-click>Appears on first click</div>
<div v-click="[2]">Appears on second click</div>

<v-clicks>
  - First bullet point
  - Second bullet point
  - Third bullet point
</v-clicks>
This keeps audiences focused on your current point rather than reading ahead.
Flexible Positioning with v-drag
Need to adjust element placement on the fly? The v-drag directive makes elements draggable and resizable during development. Double-click to adjust, and your changes save directly to the Markdown file:
<div v-drag class="absolute">
  Drag me anywhere
</div>
Smooth Animations with v-motion
Add professional polish with Vue Motion animations that respond to clicks:
<div
  v-motion
  v-click
  :initial="{ x: -80 }"
  :enter="{ x: 0, y: 0 }"
  class="border-teal bg-teal/10 absolute top-5 left-14"
  :click-1="{ y: 75, height: 130 }"
  :click-3="{ y: 205, height: 160 }"
/>
This creates dynamic diagrams that reveal themselves step-by-step, perfect for explaining complex concepts.
Slide Transitions
Control how slides transition with built-in effects: fade-out, fade, slide-up, view-transition, or none:
---
transition: fade-out
---
Choose transitions that match your presentation’s tone - subtle for professional talks, dynamic for engaging workshops.
Presentation Mode
Speaker Notes That Actually Help
Keep your talking points organized with HTML comments that only you see:
<!--
Explain the problem we're solving
[click]
Show how this pattern solves it
[click]
Mention the performance implications
-->
The [click] markers automatically highlight and scroll to the next section of your speaker notes when you advance slides, keeping you perfectly in sync.
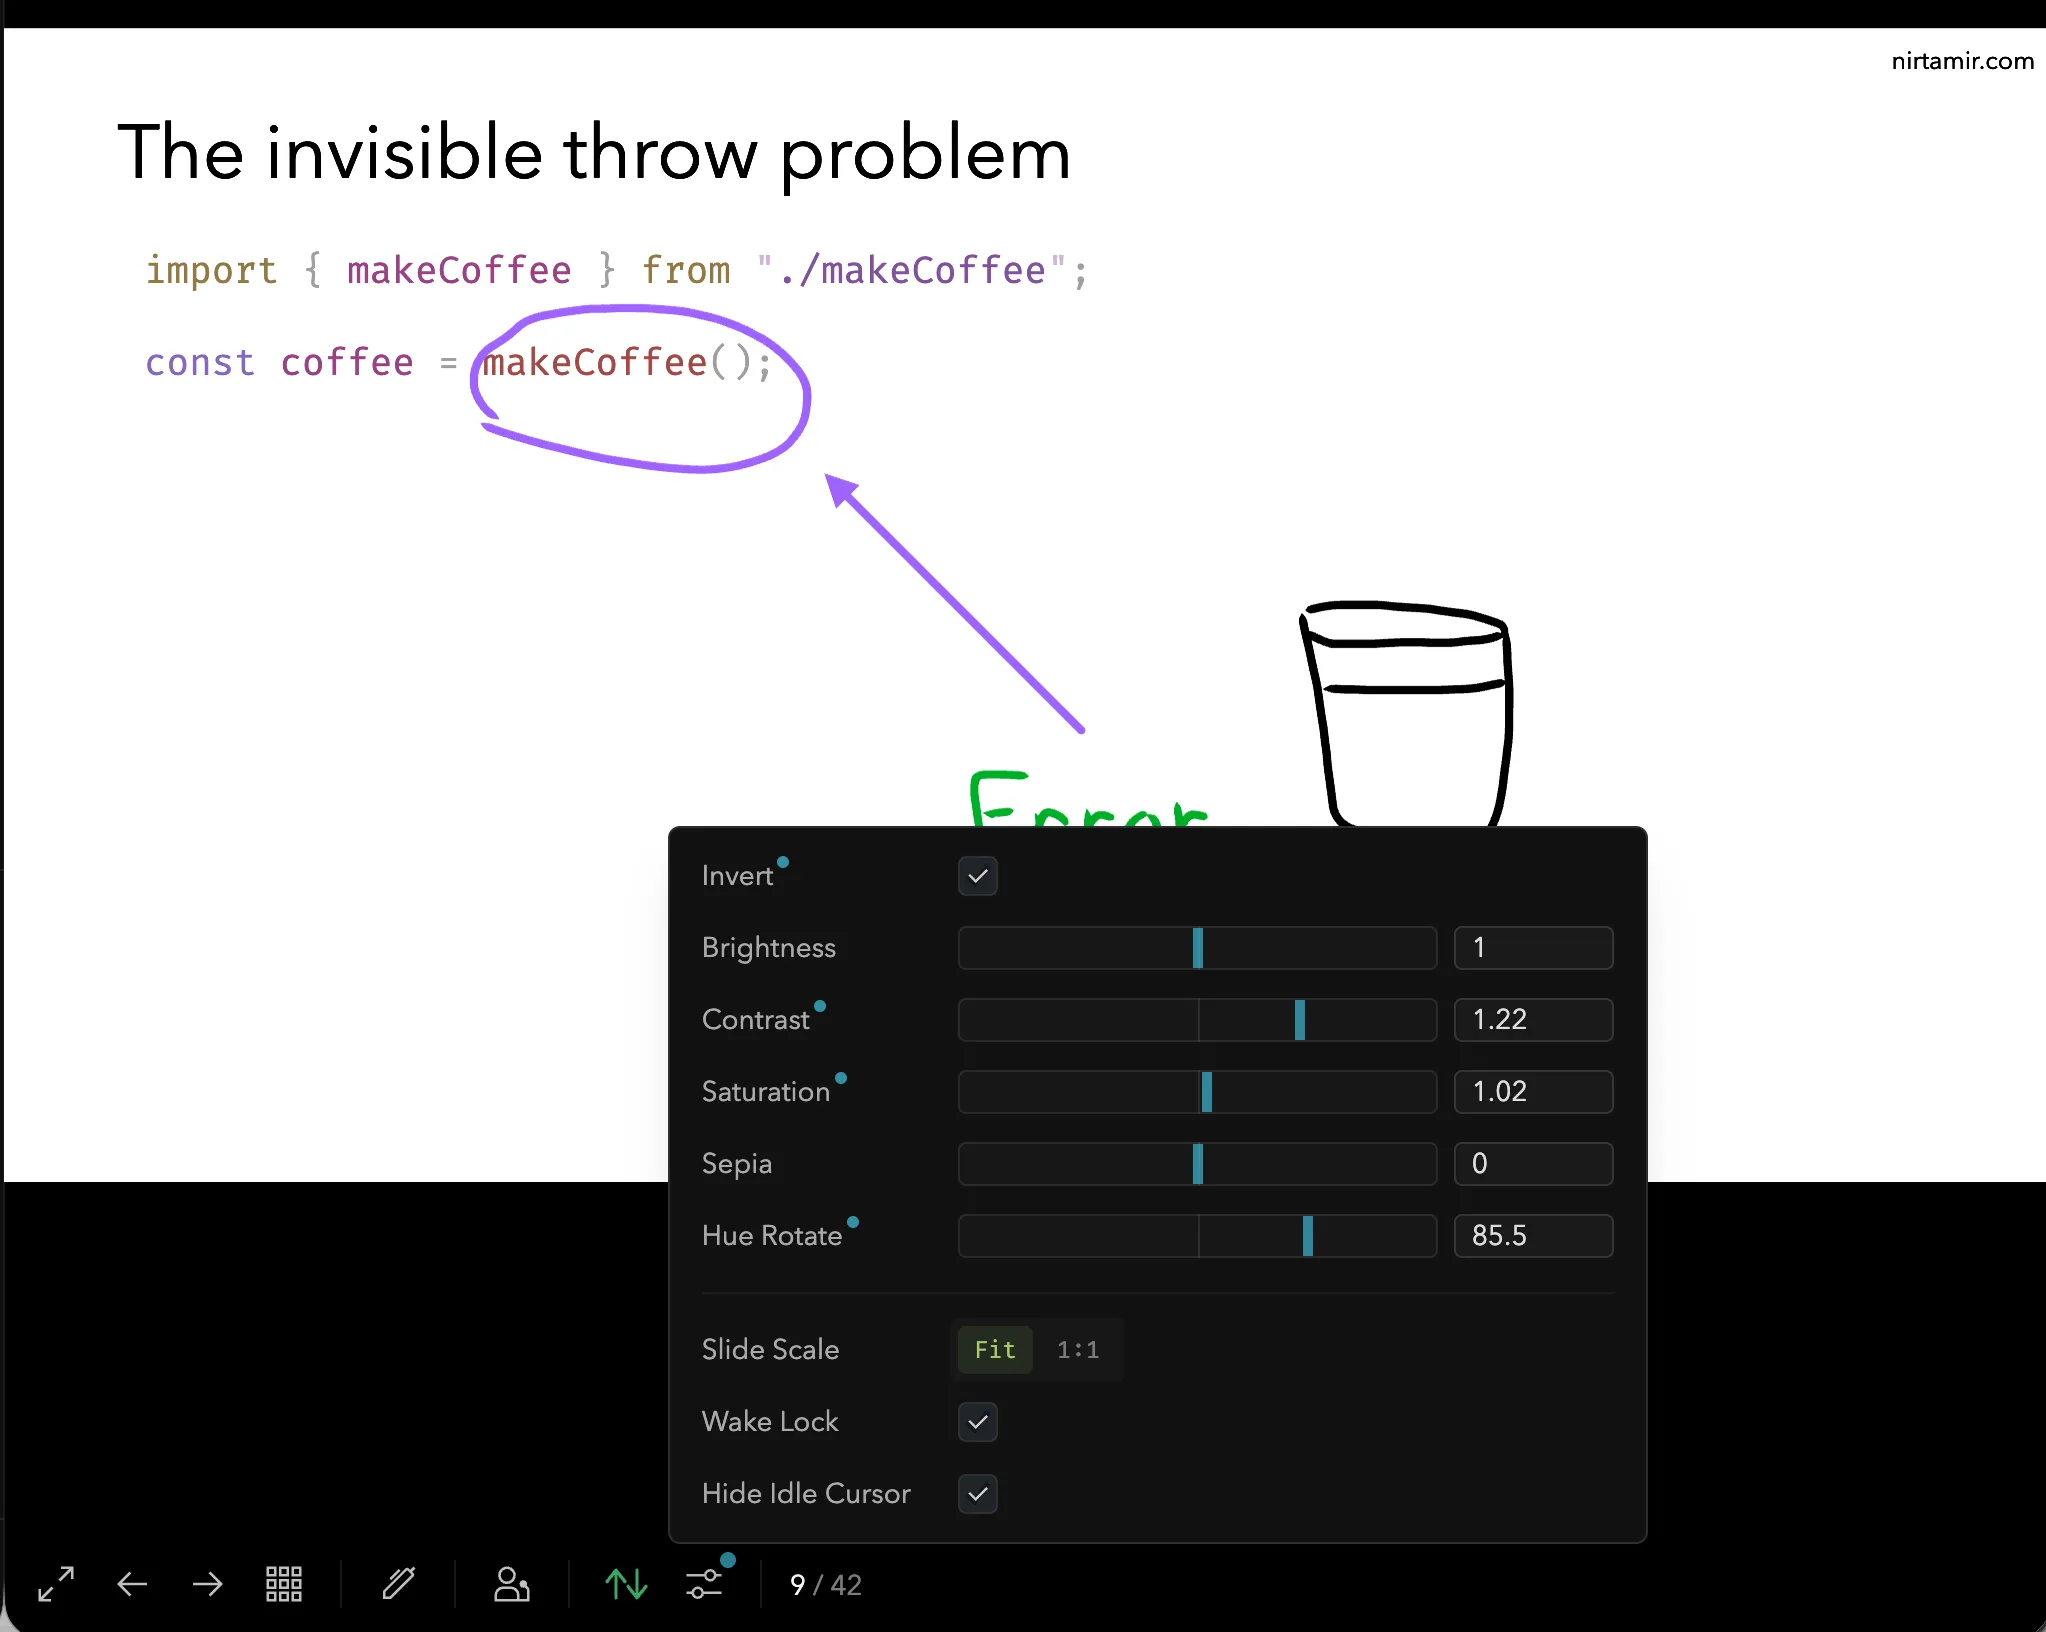
Powerful Speaker View Features
The speaker view isn’t just about notes:
- Cursor synchronization between speaker display and projected slides
- Drawing tools that auto-save for reuse in future presentations
- Visual adjustments for hue, contrast, and brightness to adapt to different venues
- Next slide preview so you’re never caught off guard


Recording Presentations
Create video presentations with camera overlay - perfect for virtual conferences, recorded tutorials, or practice sessions. Slidev handles the technical setup so you can focus on presenting.
Slides Overview Mode
Press o during your presentation for a bird’s-eye view of all slides. This isn’t just for navigation - you can edit slides directly from overview mode, making last-minute adjustments effortless.

Advanced Customization
Reusable Components
Create Vue components in the components/ folder to encapsulate common functionality. For example, a QR code component:
<!-- components/QrCode.vue -->
<script setup lang="ts">
import { renderSVG } from "uqr";
import { computed } from "vue";

const props = defineProps<{
  text: string;
  white?: string;
  black?: string;
}>();

const html = computed(() =>
  renderSVG(props.text, {
    whiteColor: props.white,
    blackColor: props.black,
  }),
);
</script>

<template>
  <div v-html="html" />
</template>
Use in any slide:
<QrCode text="https://myslides.com" />React Components
Need React instead of Vue? The slidev-addon-react addon lets you embed React components. Create components in react-components/ and use them:
<React is="MyComponent" prop="value" />Custom Syntax with Preparers
Advanced feature: Create custom Markdown syntax for your specific needs. For example, I built a @@@ syntax block that renders multiple code files in an interactive Sandpack editor. The FilesPlayground component is a custom React component I created using Sandpack that displays multiple code files with tabs.
Create setup/preparser.ts and define your transformation:
const SANDPACK_BLOCK_REGEX =
  /@@@\s*\n((?:```tsx sandpack[^\n]*\n[\s\S]*?\n```\s*)+)@@@/g;

export default definePreparserSetup(() => {
  return [
    {
      name: "sandpack @@@",
      async transformSlide(content) {
        return content.replaceAll(SANDPACK_BLOCK_REGEX, transformSandpackBlock);
      },
    },
  ];
});

function transformSandpackBlock(match: string, blocksContent: string): string {
  const files = mergeByIndex(extractFilesFromBlocks(blocksContent));
  const filesJson = JSON.stringify(files).replaceAll('"', """);
  return `<React is="FilesPlayground" :files="${filesJson}"></React>`;
}
Usage in slides:
@@@
```tsx sandpack index=0
import { OrbitControls } from "@react-three/drei";
import { Canvas } from "@react-three/fiber";
export default function App() {
return (
<Canvas>
<OrbitControls />
<mesh>
<boxGeometry args={[1, 1, 1]} />
<meshMatcapMaterial color={"#0066CC"} />
</mesh>
</Canvas>
);
}
```
```tsx sandpack index=1
import { OrbitControls } from "@react-three/drei";
import { Canvas } from "@react-three/fiber";
export default function App() {
return (
<Canvas>
<OrbitControls />
<axesHelper />
<mesh position={[0, 0, 0]} scale={[1, 1, 1]} rotation={[0, 0, 0]}>
<boxGeometry args={[1, 1, 1]} />
<meshMatcapMaterial color={"#0066CC"} />
</mesh>
</Canvas>
);
}
```
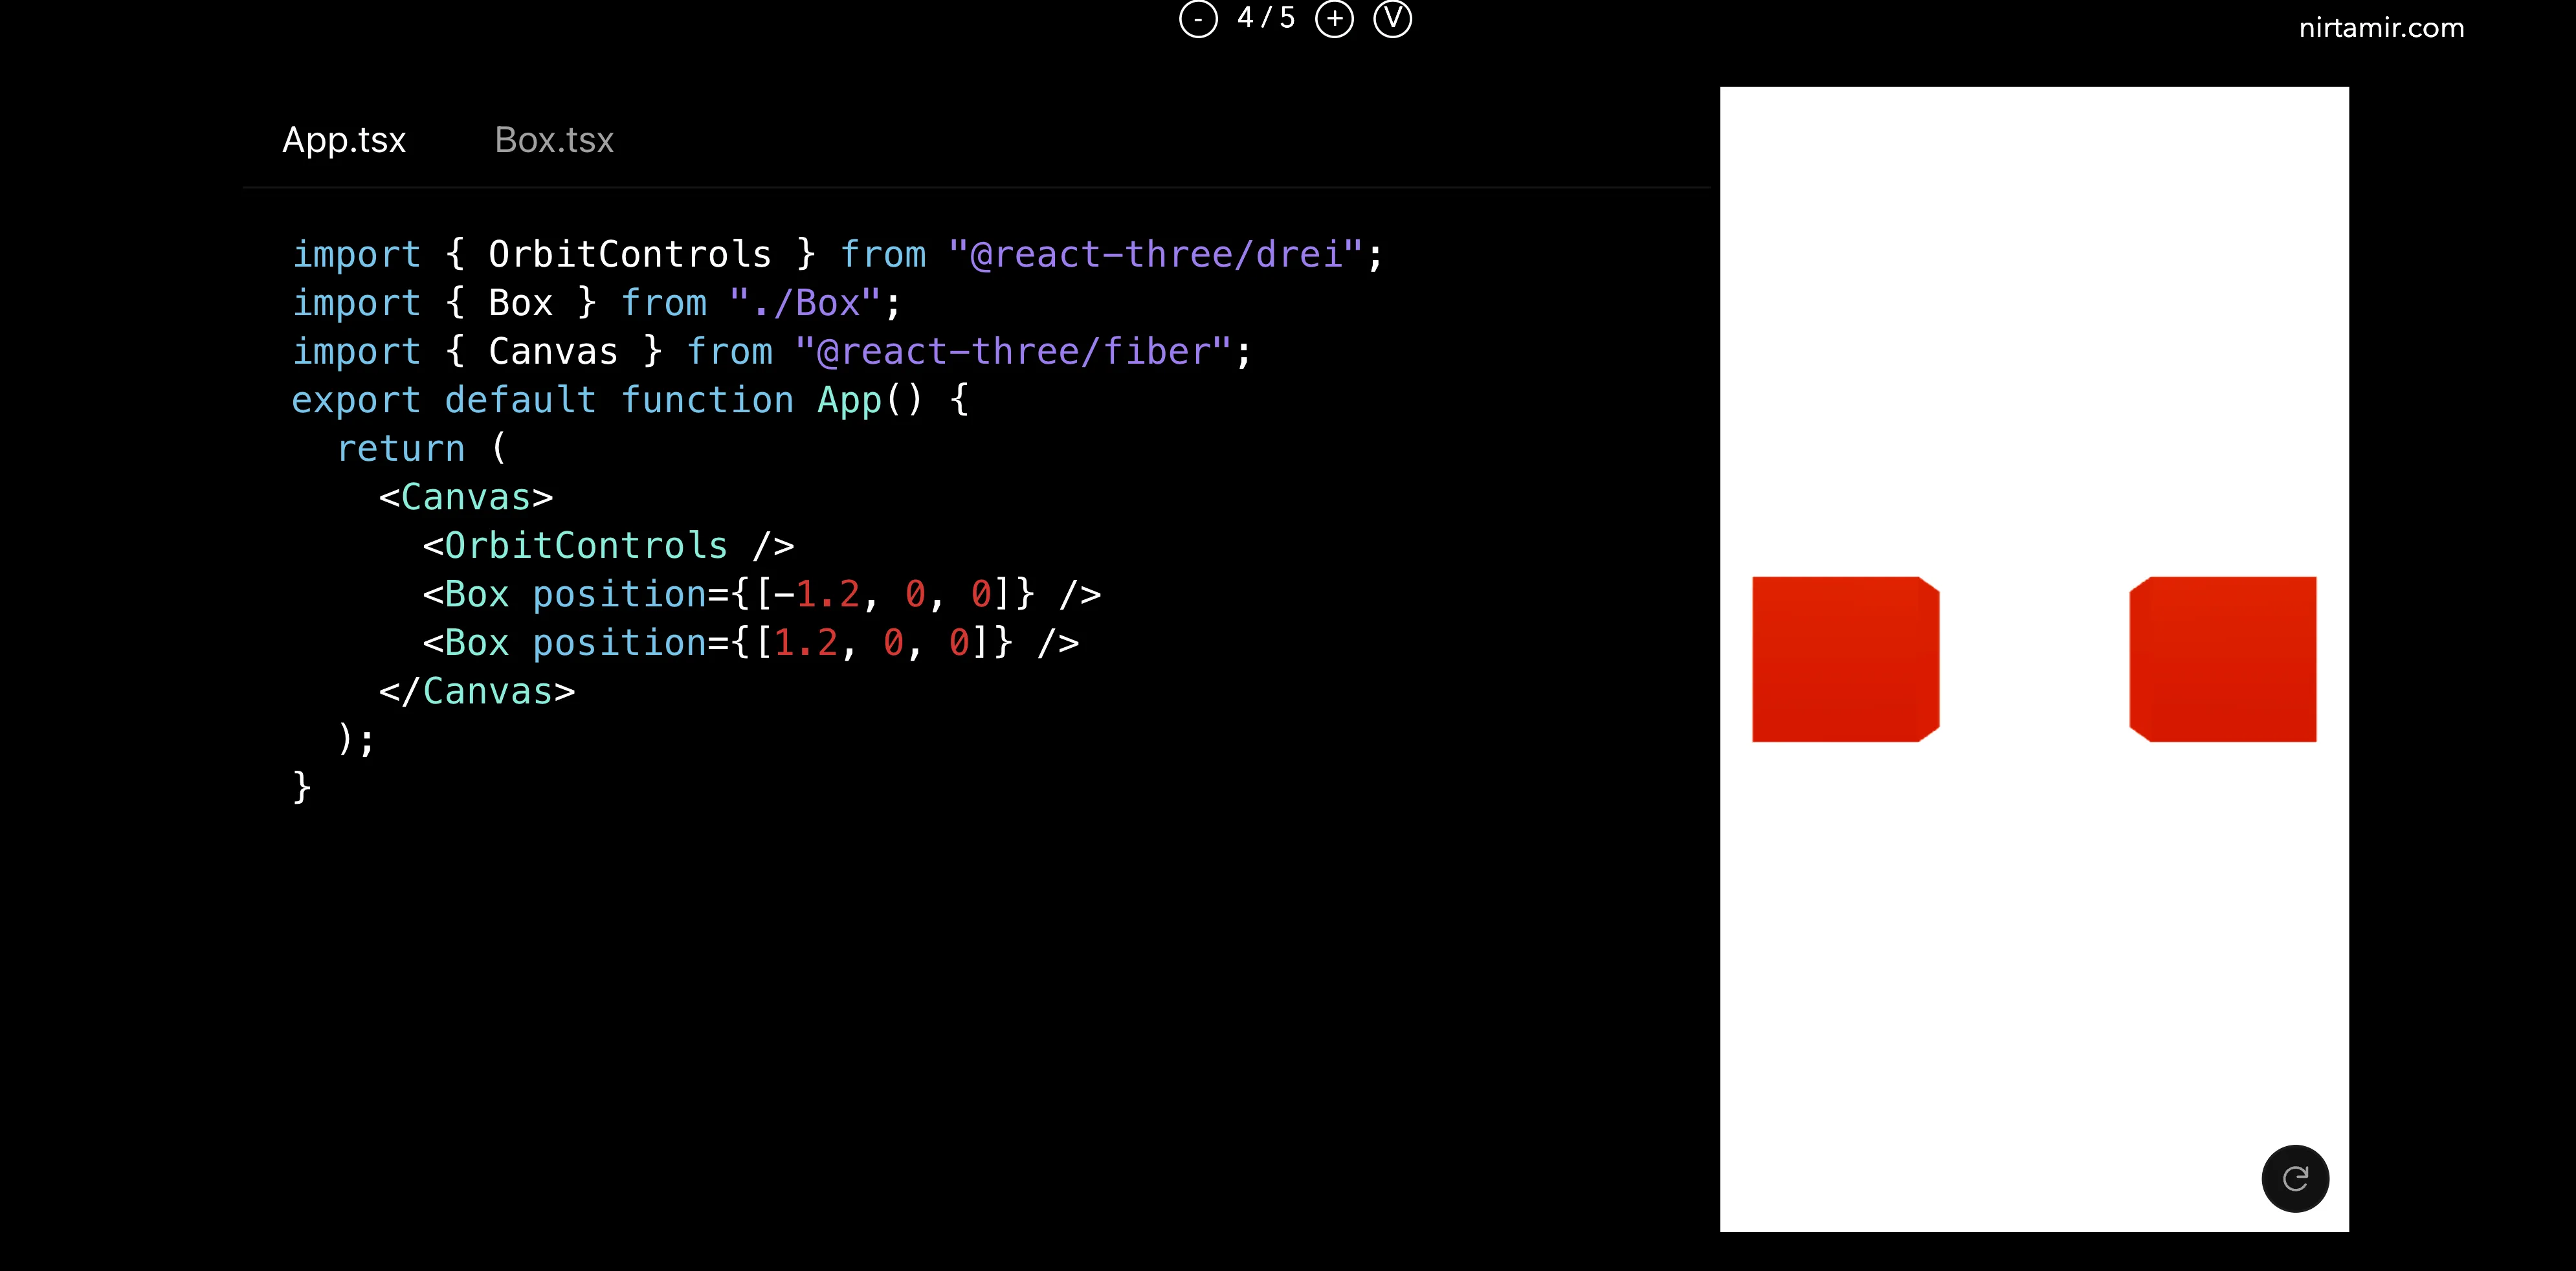
```tsx sandpack index=2 file="App.tsx"
import { OrbitControls } from "@react-three/drei";
import { Canvas } from "@react-three/fiber";
import { Box } from "./Box";
export default function App() {
return (
<Canvas>
<OrbitControls />
<Box position={[-1.2, 0, 0]} />
<Box position={[1.2, 0, 0]} />
</Canvas>
);
}
```
```tsx sandpack index=2 file="Box.tsx"
import { useState } from "react";
import type { ThreeElements } from "@react-three/fiber";
export function Box(props: ThreeElements["mesh"]) {
const [hovered, setHover] = useState(false);
const [active, setActive] = useState(false);
return (
<mesh
{...props}
scale={active ? 1.5 : 1}
onClick={() => setActive(!active)}
onPointerOver={() => setHover(true)}
onPointerOut={() => setHover(false)}
>
<boxGeometry args={[1, 1, 1]} />
<meshMatcapMaterial color={hovered ? "#0066CC" : "#FF5733"} />
</mesh>
);
}
```
@@@
Note: This is advanced functionality. Most users won’t need it, but if you’re building a presentation toolkit for your team or have unique requirements, it enables powerful customization. Learn more about preparers and transformers in the docs.
Global Styling
Create src/global-top.vue for styles that apply to all slides:
<style>
.slidev-runner-output {
  overflow: auto;
  max-height: 200px;
}

code {
  --prism-font-size: 16px;
}

.slidev-code {
  --slidev-code-font-size: 16px;
  --slidev-code-line-height: 20px;
}

.slidev-react-container {
  width: 100%;
  height: 100%;
}
</style>
Use global-top.vue or global-bottom.vue to add headers, footers, or animated elements that persist across slides. Antfu uses this technique for smooth animated backgrounds that transition between slides.
Embedding Live Demos
Integrate live examples or documentation directly into your slides:
<iframe src="https://example.com" width="100%" height="400"></iframe>Video Demonstrations
Include video walkthroughs or screen recordings:
<SlidevVideo controls>
  <source src="/demo.mp4" type="video/mp4" />
</SlidevVideo>
Deployment & Sharing
Exporting
Generate multiple formats from a single source:
# Export speaker notes
slidev export-notes

# Create PDFs (one per slide or combined)
slidev export --per-slide --output presentation.pdf

# Generate PowerPoint files
slidev export --format pptx
Hosting
You can deploy to any static hosting service, including GitHub Pages, Netlify, Vercel, or any other static host. Once deployed, your presentations are available as shareable URLs that work on any device.
Ecosystem
Extend Slidev with community addons:
- slidev-addon-graph - Interactive graph visualizations
- slidev-component-spotlight - Highlight specific areas
- slidev-component-zoom - Zoom into details
- slidev-addon-react - React component support
Search npm for slidev-addon-* to discover more.
Conclusion
Slidev empowers developers to create presentations that are as dynamic and precise as the code they explain. By treating slides as code, you gain version control, reusable components, and the ability to embed actual running code in your presentations.
With AI tools becoming more prevalent, they can now assist in creating these presentations, helping you write content, generate code examples, or even suggest slide layouts. Start with pnpm create slidev - the default template comes packed with features demonstrating what’s possible. You can pick and choose what works for your presentation style and gradually incorporate more advanced techniques as you become comfortable with the tool.
For developers seeking a modern presentation tool that truly understands code, Slidev is unmatched.